
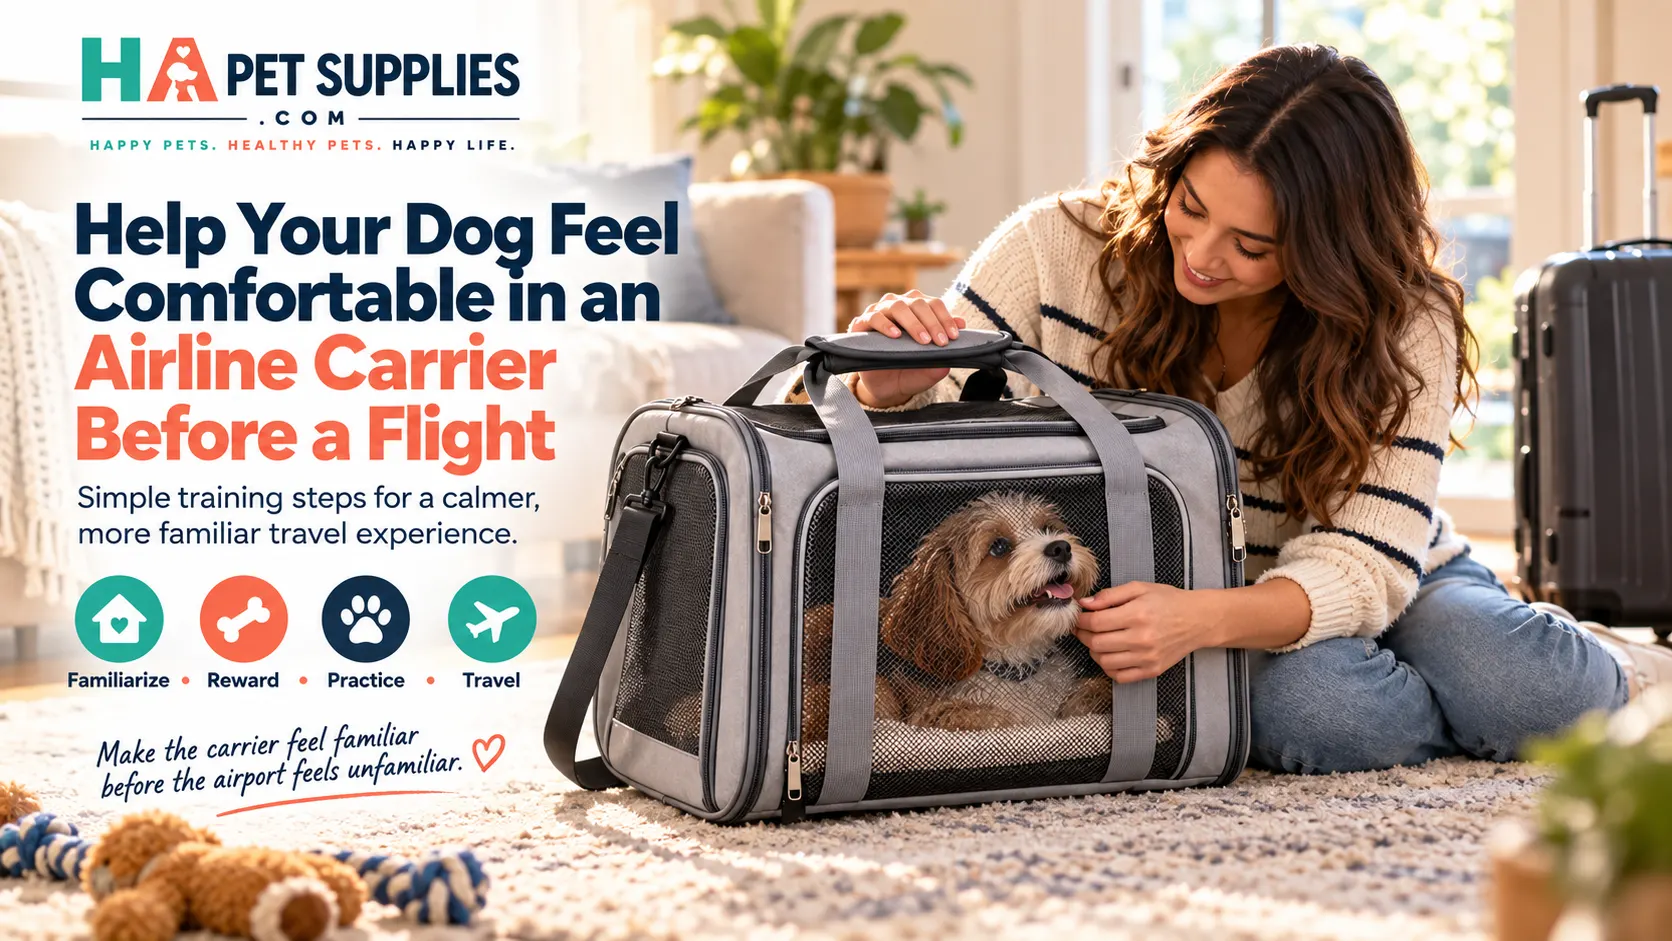
Learning how to get a dog comfortable in an airline carrier should ideally begin long before you enter an airport.
For many owners, the carrier becomes stressful because it appears only when something unusual is about to happen.
The dog sees the bag.
The zipper closes.
The house disappears.
Then come car movement, crowds, airport announcements, security screening, unfamiliar people, boarding and aircraft noise.
From the dog’s perspective, that is a large number of new experiences happening at once.
A better approach is to make the dog airline carrier itself familiar first.
Instead of expecting your dog to tolerate an unfamiliar bag during an unfamiliar journey, introduce the carrier at home and teach your dog—through small, positive experiences—that entering it does not automatically predict something frightening.
IATA’s guidance for passengers travelling with dogs and cats specifically recommends introducing animals to the travel container well before the journey so the stress associated with confinement can be reduced. IATA
You can review the official IATA passenger guidance for dogs and cats travelling in the cabin.
The USDA likewise emphasizes that a dog’s readiness and temperament matter alongside the suitability of the travel kennel. APHS
Before training begins, make sure you are working with a carrier that is actually appropriate for your dog and flight. If you are still choosing one, read HA Pet Supplies’ guide to choosing a dog airline carrier based on size, airline requirements and travel features before trying to train your dog into equipment that may ultimately be the wrong size.
You can also compare the HA Pet Supplies dog airline carrier while working through the steps below.
The objective is not simply:
“Get my dog inside the carrier.”
The better objective is:
“Teach my dog that entering, resting, being enclosed and moving inside this carrier are predictable experiences that they can cope with calmly.”
That distinction can make the difference between genuine preparation and simply forcing compliance before travel day.
Why Learn How to Get a Dog Comfortable in an Airline Carrier Before Flying?
A carrier can be physically appropriate and still feel emotionally unfamiliar.
That matters because air travel already introduces many new experiences.
Your dog may encounter:
- a car ride
- luggage movement
- unfamiliar parking areas
- airport doors
- large crowds
- rolling suitcases
- loud announcements
- security handling
- people standing close by
- jet bridges
- engine sounds
- vibration
- changes in pressure and movement
If the carrier itself is also completely unfamiliar, you are stacking one stressor on top of another.
VCA’s veterinary behaviour guidance notes that commercial air travel involves periods of confinement and that dogs should receive appropriate confinement training before a journey rather than encountering it for the first time during travel. Vca
VCA’s veterinary guide to dog air and car travel provides useful context on why this preparation matters.
The American Kennel Club similarly recommends introducing a carrier early and pairing it with praise and rewards so that the dog builds a positive association before flying. American Kennel Club
Read AKC’s dog airline travel preparation guide.
The key concept is desensitisation through manageable exposure.
You are not trying to eliminate every possible reaction to travel.
You are trying to reduce the number of completely new things your dog must cope with on the same day.
Before Training: Make Sure the Dog Airline Carrier Actually Fits
Do not attempt to solve a physical fit problem through behaviour training.
If your dog cannot comfortably position itself inside the carrier, no amount of treats will make the carrier genuinely appropriate.
USDA guidance says an air-travel kennel should provide enough room for an animal to stand, turn around, sit erect and lie in a natural position. APHS
USDA APHIS’ current Pets on Planes preparation lesson also explains that kennel size, construction, ventilation and safety are important parts of travel readiness.
For in-cabin travel, space creates a special challenge because the carrier also needs to meet airline under-seat requirements.
IATA notes that under-seat space is limited and warns that soft carriers can compress in ways that obstruct ventilation. IATA
Before beginning a training plan, verify:
- your dog’s usable interior space
- external carrier dimensions
- airline size limits
- ventilation
- zipper security
- stable flooring
- whether the carrier collapses excessively
- whether your dog is physically suited to cabin travel
If you are uncertain about product suitability, use the HA Pet Supplies contact page rather than trying to make an unsuitable size work through training.
3D Infographic — The 7-Step Comfort Ladder
SEE → APPROACH → ENTER → REST → ZIP → WAIT → TRAVEL
Step 1 — SEE
Carrier exists nearby without anything happening.
Step 2 — APPROACH
Dog voluntarily walks toward it.
Step 3 — ENTER
Dog steps inside by choice.
Step 4 — REST
Dog begins settling inside with the door open.
Step 5 — ZIP
Door closes briefly.
Step 6 — WAIT
Closed-carrier duration increases gradually.
Step 7 — TRAVEL
Movement, carrying, car travel and realistic practice are added.
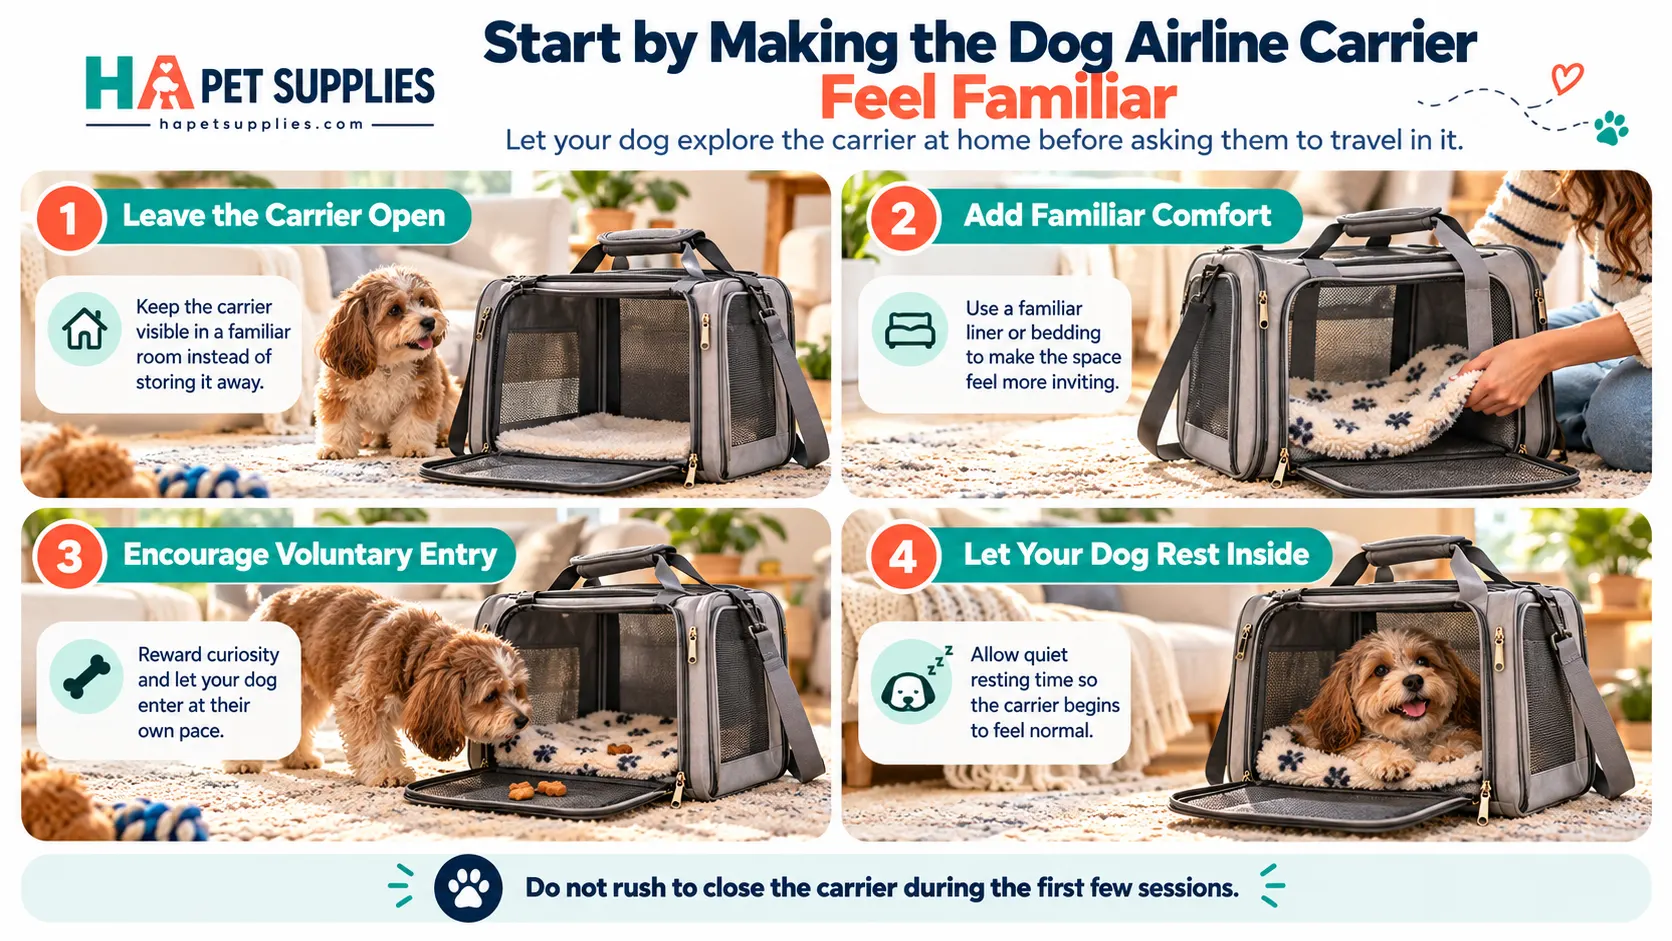
Step 1: How to Get a Dog Comfortable in an Airline Carrier by Leaving It Open
The first stage may feel almost too simple:
Put the carrier in the room.
Open the entrances.
Secure them so they do not unexpectedly swing, collapse or close.
Then let your dog decide whether to investigate.
Do not immediately call the dog over and zip it inside.
The carrier should first become part of the environment.
Place it in an area where your dog already feels comfortable.
That might be:
- beside a familiar resting area
- in the living room
- near a quiet corner
- somewhere the family regularly spends time
The RSPCA recommends introducing a crate in a familiar area and initially fixing the door open so it cannot unexpectedly move and frighten the dog. It emphasizes positive associations and gradual progress rather than rushing. RSPCA
Read the RSPCA’s step-by-step crate-training advice.
For the first few sessions, you may not need your dog to enter at all.
Reward looking.
Reward sniffing.
Reward walking past calmly.
The carrier should not become an object that predicts restraint.
Step 2: Reward Your Dog for Curiosity Around the Carrier
Now begin giving the carrier a positive meaning.
Place a treat near it.
Later, place one close to the entrance.
Then just inside.
You can also use:
- part of your dog’s meal
- a familiar toy
- praise
- another reward your dog genuinely values
The objective is not bribery.
It is association.
Carrier interaction → good things happen.
AKC’s crate-training guidance recommends rewarding dogs for approaching their crate, feeding near it and using treats or toys to make the space positively associated. American Kennel Club
AKC’s step-by-step crate-training method follows the same overall principle: awareness first, then exploration, then gradually increasing confinement.
Fear Free also recommends leaving treats, toys and food puzzles in the carrier so the dog voluntarily returns to explore the space. Fear Free Happy Homes
Do not turn this step into:
“You only get the treat if your whole body enters.”
Reward smaller progress.
For a hesitant dog:
Looking at the carrier may be progress.
Sniffing the entrance may be progress.
Putting one paw inside may be progress.
The more confidence you build here, the less conflict you may face later.
Step 3: Teach Voluntary Entry Into the Dog Airline Carrier
Once your dog willingly approaches the carrier, begin encouraging full entry.
Place rewards progressively farther inside.
Do not push the dog from behind.
Do not lift the dog into the bag simply because training feels slow.
Fear Free specifically advises against pushing, pulling or corralling a dog into a kennel or carrier and instead encourages voluntary investigation. Fear Free Happy Homes
At first, let your dog enter, take the reward and immediately leave.
That freedom matters.
Your dog learns:
Going inside does not mean I become trapped.
Repeat this across several short sessions.
Eventually, wait a second before presenting the reward.
Then perhaps two seconds.
You are beginning to teach that remaining inside calmly also has value.
Step 4: Build Comfort Inside Before Closing the Carrier
This is an important stage that impatient owners often skip.
Your dog should learn to remain inside with the door open before you focus heavily on confinement.
You might:
- feed part of a meal inside
- offer a safe chew
- reward a down position
- sit nearby calmly
- allow the dog to exit whenever it chooses
AKC recommends feeding meals inside a crate and gradually teaching the dog to view the space as a positive resting place. American Kennel Club
The AKC guide to crate training also cautions against forcing dogs into crates or simply leaving a distressed dog to “cry it out.”
RSPCA guidance similarly recommends feeding in the crate and increasing time gradually only while the dog remains comfortable. RSPCA
What success looks like
Your dog:
- walks in without being pushed
- eats normally
- looks around without immediately trying to leave
- sits or lies down
- shows relaxed rather than frantic movement
- voluntarily returns to the carrier later
Do not obsess over perfect stillness.
The goal is comfort, not statue-like obedience.
Step 5: Close the Dog Airline Carrier for Only a Few Seconds
Once the dog can remain inside voluntarily, introduce the zippered or closed state.
This is a separate skill.
Start tiny.
Dog enters.
Reward.
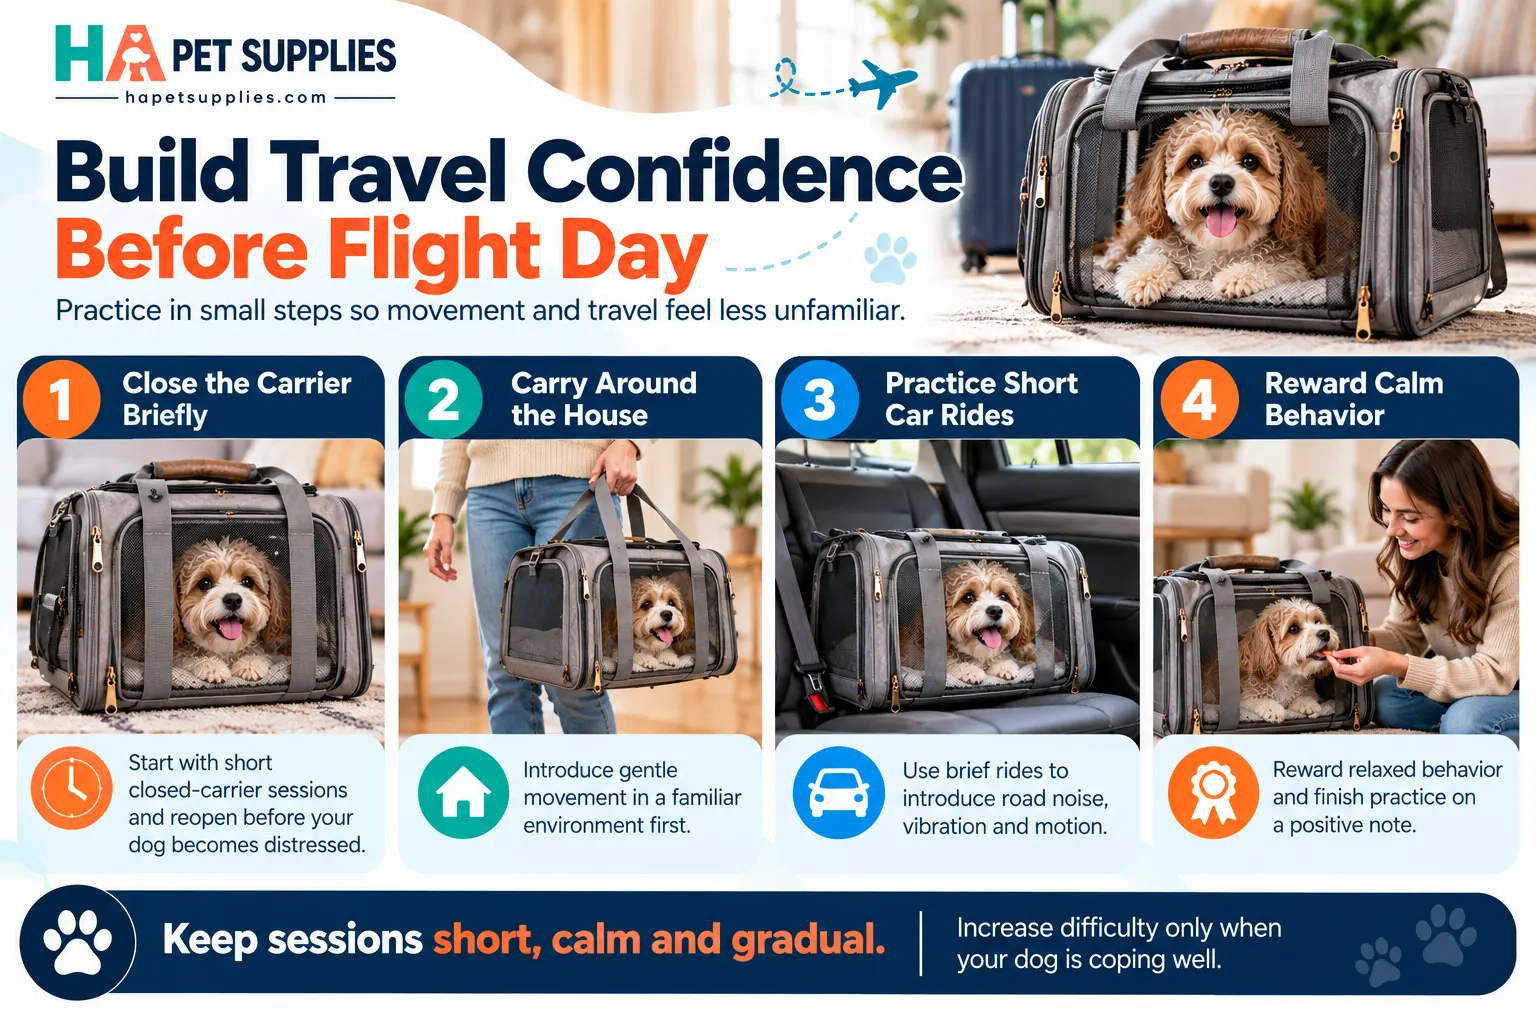
Close the carrier.
Wait perhaps one or two seconds.
Open.
Reward.
End.
That may be the entire session.
Fear Free recommends initially closing a carrier door for only a couple of seconds and gradually extending duration while the dog remains calm. Fear Free Happy Homes
The RSPCA uses the same gradual principle: the first closed sessions should be brief, with duration increased only after the dog remains comfortable. RSPCA
Do not begin with ten minutes simply because your eventual flight will last several hours.
Duration should be built, not imposed.
Step 6: Increase Closed-Carrier Time Gradually
Now start extending duration.
A progression might look like:
2 seconds → 5 seconds → 15 seconds → 30 seconds → 1 minute → several minutes
That is not a universal schedule.
Your dog’s behaviour determines the pace.
Some dogs progress quickly.
Others need much smaller increases.
Do not increase duration every single repetition.
Mix easy repetitions into harder ones.
For example:
30 seconds.
Then 10 seconds.
Then 25 seconds.
Then 5 seconds.
This can prevent the dog from learning that every session becomes progressively harder.
The Humane Society’s crate-training material emphasizes that training may take days or weeks depending on age, temperament and past experience, and that confinement should be built through a series of small steps. Humane World for Animals
This is one reason you should buy and introduce the carrier well before the flight.
A deadline can tempt owners to move faster than the dog can cope with.
How Long Should a Dog Stay in the Airline Carrier During Training?
There is no useful universal answer such as:
“Train for exactly 30 minutes per day.”
Instead, ask:
Is my dog still comfortable?
A short successful session is more valuable than a long session that ends in panic.
Watch for:
- relaxed body posture
- normal breathing
- willingness to take food
- lying down
- calm observation
- choosing to re-enter later
If the dog becomes increasingly uncomfortable, reduce duration.
Training should prepare the dog for travel—not prove that the dog can endure discomfort.
Step 7: Add Movement Before the Real Flight
A stationary carrier in your living room does not fully prepare a dog for travel.
Eventually, the carrier will:
- be lifted
- tilt slightly
- move through hallways
- enter a vehicle
- experience vibration
- be placed on different surfaces
- travel through crowds
- experience airport sounds
Add those sensations gradually.
Start by lifting the carrier an inch from the floor.
Put it down.
Reward.
Next session, lift it for a few seconds.
Then carry it several steps.
Later, walk around the house.
Fear Free recommends gradually working from stationary carrier time to longer periods and then carrying the dog, while holding the carrier securely rather than allowing it to swing. Fear Free Happy Homes
Read Fear Free’s travel carrier training advice.
This part is especially relevant for a soft airline carrier because shoulder carrying can create noticeable motion.
Practise stable carrying.
If you are considering the HA Pet Supplies dog airline carrier, practise both hand-carry and shoulder-carry positions that you realistically expect to use.
3D Infographic — From Living Room to Flight Day
HOME
Open carrier, rewards, resting.
MOVEMENT
Short carrying sessions around the house.
CAR
Brief controlled journeys.
AIRPORT-STYLE PRACTICE
Movement, background noise and longer carrier sessions.
Add Short Car-Ride Practice
Once your dog is comfortable with the carrier being moved, add vehicle practice where appropriate.
Do not begin with a two-hour motorway journey.
Blue Cross recommends introducing dogs to cars gradually, beginning with brief exposure, then the stationary car, then very short drives, and increasing duration only after the dog remains comfortable. Blue Cross
Blue Cross’s dog car-travel training advice provides a useful model for gradual travel exposure.
A practical progression could be:
Carrier inside the parked car.
Then engine on.
Then drive around the block.
Then 10 minutes.
Then slightly longer.
If your dog becomes carsick or highly distressed, discuss that separately with your veterinarian rather than assuming more exposure will automatically solve it.
Recreate Some Airport Experiences Without Going to the Airport
You cannot perfectly recreate airport travel at home.
You do not need to.
The goal is simply to reduce novelty.
Practise:
- carrier being picked up
- rolling suitcase nearby
- household background noise
- elevator rides if available and appropriate
- waiting quietly in the carrier
- brief exposure to busier but dog-appropriate public environments
- walking calmly around unfamiliar people
- settling after movement
AKC’s travel-training guidance recommends gradually introducing dogs to unfamiliar travel-related situations and environments rather than presenting everything for the first time during the trip. American Kennel Club
AKC also identifies skills such as calm behaviour around crowds as useful preparation for airports. American Kennel Club
Do not deliberately frighten your dog with extremely loud airport recordings.
Realistic preparation should build confidence, not manufacture panic.
How to Know When Carrier Training Is Moving Too Fast
The clearest training mistake is increasing difficulty while your dog’s behaviour is telling you to decrease it.
Possible signs of stress can include:
- repeated escape attempts
- frantic scratching
- chewing mesh or zippers
- persistent barking
- intense whining
- trembling
- refusal of food the dog normally wants
- heavy panting unrelated to temperature or recent exercise
- drooling
- repeated lip licking
- tucked tail
- inability to settle
- avoiding the carrier when it appears
Blue Cross lists behaviours including excessive panting, vocalisation, lip licking, yawning, tucked posture and other changes as possible signs of travel stress. Blue Cross
Do not diagnose an entire emotional state from one signal alone.
Look at context and combinations.
If your dog starts becoming increasingly distressed after you move from an open carrier to a zipped one, the progression may simply be too fast.
Go backward.
That is not failure.
It is training.
3D Traffic-Light Infographic — Should You Continue?
GREEN — KEEP GOING
- approaches voluntarily
- enters without force
- accepts rewards normally
- settles
- can remain briefly without escalating stress
YELLOW — MAKE IT EASIER
- hesitates
- repeatedly leaves
- paws at the door
- stops settling
- shows increasing tension
- becomes less interested in rewards
RED — STOP AND GET HELP
- panics
- attempts to injure itself escaping
- chews frantically through mesh
- becomes highly aggressive
- shows severe confinement distress
- cannot settle even at the earliest stages
Fear Free advises that dogs showing significant fear, anxiety or stress around confinement may require help from a veterinarian, reward-based trainer or veterinary behaviour professional rather than simply a stronger carrier. Fear Free Happy Homes
What If Your Dog Already Hates the Airline Carrier?
Perhaps the carrier is not neutral.
Maybe it already means:
vet appointment
or
being forced into the car
or
something scary is about to happen.
In that situation, start farther back.
Place the carrier at a distance where the dog can notice it without immediately avoiding it.
Reward calm behaviour.
Do not require entry.
Over several sessions, gradually make interaction easier and more positive.
You may also need to determine whether the problem is actually the carrier itself.
Ask:
Is it too small?
Does it collapse around the dog?
Does it have unstable flooring?
Does it swing dramatically while being carried?
Is the dog getting carsick afterward?
Has the dog repeatedly been forced inside?
A training problem sometimes turns out to be an equipment or travel problem.
If the existing carrier is unsuitable, compare other options through the HA Pet Supplies dog supplies collection or HA Pet Supplies shop before repeatedly practising with equipment that creates discomfort.
What If Your Dog Panics When the Zipper Closes?
Separate the sound and the confinement.
Practise moving the zipper without closing the dog inside.
Reward.
Move it slightly.
Reward.
Zip one section.
Reward.
Later, close the carrier for one second.
Open.
Reward.
This is similar to breaking a larger behaviour into smaller pieces.
The dog may be comfortable inside while still being worried about the actual closure.
Do not assume those are the same skill.
How Long Before a Flight Should Carrier Training Begin?
Earlier is generally better.
There is no guaranteed number of days.
AKC has recommended purchasing the travel crate well before departure and letting the dog become familiar with it before travel. American Kennel Club
AKC’s air-travel safety article emphasizes getting the dog accustomed to the travel crate instead of introducing it immediately before flying.
Some dogs may become comfortable relatively quickly.
Others may take weeks.
A dog with previous confinement anxiety may require much more time.
So rather than setting:
“We will finish carrier training in five days.”
set:
“We will progress as long as the dog remains comfortable.”
If the flight date is approaching faster than the training, reassess the travel plan rather than simply forcing the final stages.
How Often Should You Practise?
Short, repeatable sessions are usually preferable.
You might perform several tiny carrier interactions across the day rather than one exhausting 45-minute session.
Examples:
Morning: Drop two treats inside.
Afternoon: Dog enters and lies down for 30 seconds.
Evening: Zip the carrier for 15 seconds.
Next morning: Carry it around the room.
Training becomes part of ordinary life instead of a major event.
The RSPCA recommends short initial sessions and gradual progress. RSPCA
Consistency usually matters more than marathon sessions.
Can Meals Help a Dog Become Comfortable in a Carrier?
Yes, for many dogs.
Feeding inside can make the carrier predict something familiar and positive.
Start wherever your dog is comfortable.
If your dog will not enter, place the bowl near the entrance.
Later, move it slightly inside.
Eventually, place it farther toward the back.
RSPCA specifically recommends using meal feeding as a way to increase positive crate associations and duration gradually. RSPCA
Do not use a full meal immediately before intensive movement practice if your dog is prone to travel sickness.
Carrier conditioning and travel-day feeding are separate decisions.
Should You Put Familiar Bedding Inside?
A familiar-smelling item can help some dogs.
But airline travel introduces practical limits.
Thick bedding can:
- reduce usable space
- block ventilation
- increase warmth
- bunch around the dog’s face
IATA recommends absorbent bedding for in-cabin travel while also emphasizing adequate ventilation and usable space. IATA
For short-nosed dogs in particular, AVMA advises avoiding thick blankets or fluffy materials that could interfere with breathing and recommends taking extra respiratory precautions. AVMA
Read the AVMA’s short-nosed dog air-travel guidance.
Use something safe, thin and appropriate for the actual carrier.
What About Short-Nosed Dogs?
Carrier training does not remove the respiratory risks associated with brachycephalic breeds.
Dogs such as some bulldogs, pugs, Boston terriers and other short-nosed breeds can be more vulnerable to respiratory difficulty and overheating during transport.
USDA specifically highlights increased heat-stroke and breathing risks among short-nosed dogs during air travel. APHS
AVMA likewise explains that stress, heat and anatomical airway differences can increase risk. AVMA
If your dog is short-nosed or has breathing concerns, consult your veterinarian before committing to the trip.
Carrier comfort is helpful.
It does not make every dog medically suitable for air travel.
Should You Sedate a Dog That Will Not Settle in the Carrier?
Do not use sedation as a DIY replacement for training.
If your dog cannot settle, the right first question is:
Why?
Possible causes include:
- fear
- previous confinement trauma
- inadequate training
- motion sickness
- pain
- separation distress
- unsuitable carrier
- general anxiety
AVMA strongly cautions against routine tranquilisation for air travel because it can increase health risks. AVMA
If medication may be appropriate for your individual dog, discuss it with your veterinarian.
Do not experiment with human medication or unprescribed sedatives before a flight.
Health Preparation Matters Alongside Carrier Training
A calm dog should also be healthy enough to travel.
CDC recommends planning pet travel in advance, keeping vaccinations up to date, maintaining identification and checking destination requirements before travelling. CDC
CDC’s pet travel safety guidance is worth checking alongside your behavioural preparation.
USDA also considers health and readiness part of air-travel preparation. APHS
This means carrier training should sit inside a larger preparation plan:
training + health + airline rules + documents + correct carrier
not:
training only.
For the complete travel-day sequence after training is complete, use HA Pet Supplies’ Flying With a Dog for the First Time: Complete Airport & Airplane Travel Guide.
How to Prepare for Airport Security
For many dogs, airport security requires a temporary transition out of the carrier.
That means a dog who is comfortable inside the bag should also be manageable when the carrier opens.
Practise:
- calmly attaching a leash or harness
- waiting before exiting
- entering again when asked
- being held if appropriate
- returning into the carrier after brief handling
Do not wait until the security line to discover that your dog bolts through open carrier doors.
The second blog in your content cluster—Flying With a Dog for the First Time—covers the checkpoint process in more detail.
Carrier training and airport handling should support each other.
3D Infographic — “Carrier Calm Test”
ENTERS VOLUNTARILY
No pushing or lifting required.
RESTS INSIDE
Can sit or lie calmly.
ACCEPTS CLOSURE
Zipper can close without panic.
HANDLES DURATION
Can remain inside for realistic practice periods.
HANDLES MOVEMENT
Can tolerate being lifted and carried.
RECOVERS CALMLY
Returns to normal behaviour after practice.
How to Know Whether Your Dog Is Ready for Flight Day
A dog does not need to be asleep inside the carrier during every practice session.
A more realistic goal is that your dog can:
- enter without being physically forced
- tolerate the carrier being closed
- spend a meaningful period inside without escalating distress
- settle after movement
- tolerate being lifted
- re-enter after being removed
- recover normally after practice
- remain safe and physically comfortable
If your dog consistently cannot do these things shortly before departure, ask whether the journey itself needs to be reconsidered.
There is no benefit in pretending training is finished simply because the ticket is non-refundable.
What If the Flight Is Tomorrow and Your Dog Is Not Ready?
Do not attempt to compress weeks of preparation into a single evening.
You can still create several brief positive experiences, but avoid hours of forced confinement designed to “make the dog get used to it.”
Contact your veterinarian if you have concerns about your dog’s ability to cope.
Confirm whether changing the flight is possible.
If the trip is optional, postponing can sometimes be more responsible than forcing a dog through travel while severely distressed.
If you need help specifically with the HA Pet Supplies carrier or its product details before travel, contact HA Pet Supplies.
Seven-Day Example Carrier Familiarisation Plan
This is not a guarantee or rigid training schedule.
Use it as an illustration only and adjust according to the dog’s response.
Carrier Exists
Leave the carrier open. Reward investigation. No closure.
Voluntary Entry
Place rewards inside. Encourage full entry. Allow immediate exit.
Resting Inside
Feed or reward inside. Encourage short calm periods. Keep the door open.
Brief Closure
Close for several seconds. Open before stress escalates. Repeat easy sessions.
Longer Closed Sessions
Gradually increase duration. Mix easy and longer repetitions.
Movement
Lift briefly. Carry around the home. Add realistic but low-intensity movement.
Mini Travel Practice
Combine entry, closure, carrying and a short vehicle journey if your dog is comfortable.
If the dog becomes uncomfortable on Day 3, do not force Day 4 because the calendar says so.
Return to whatever level produces calm participation.
First-Time Carrier Training Checklist
Carrier Setup
- Correct size
- Airline dimensions verified
- Strong mesh
- Secure zippers
- Stable base
- Safe bedding
- Carrier inspected for damage
Early Training
- Carrier left open
- Dog willingly approaches
- Dog enters voluntarily
- Dog accepts rewards inside
- Dog can rest briefly
Closure Training
- Zipper sound introduced
- Carrier closed briefly
- Dog remains reasonably calm
- Duration increased gradually
Movement Training
- Carrier lifted briefly
- Carried around house
- Dog tolerates normal movement
- Short vehicle practice completed where appropriate
Flight Preparation
- Airline rules rechecked
- Health documentation prepared
- Dog identification current
- Airport procedures reviewed
- Dog can exit and re-enter carrier safely
Common Mistakes When Getting a Dog Used to an Airline Carrier
Mistake 1 — Only Bringing the Carrier Out Before Travel
That teaches the dog: Carrier = strange event coming. Leave it available during normal life while conditioning.
Mistake 2 — Forcing the Dog Inside
Physical force may create a negative association. Build voluntary entry where possible.
Mistake 3 — Closing It Too Soon
Entering and being confined are separate skills. Teach them separately.
Mistake 4 — Increasing Duration Too Quickly
A dog comfortable for 30 seconds is not automatically comfortable for 30 minutes. Build time.
Mistake 5 — Practising Only While the Carrier Is Stationary
Real travel involves movement. Add it gradually.
Mistake 6 — Ignoring Car Travel
If the airport requires a car journey, the dog’s travel experience begins before the terminal.
Mistake 7 — Treating Panic as Disobedience
A dog trying desperately to escape may be distressed rather than “stubborn.” Reduce difficulty and investigate the cause.
Mistake 8 — Using the Carrier as Punishment
The carrier should not become the place the dog goes after doing something wrong. The RSPCA specifically advises that crates should not be used as punishment. RSPCA
Mistake 9 — Assuming Carrier Training Fixes an Unsuitable Carrier
The equipment still has to fit.
Mistake 10 — Waiting Until the Flight Is Days Away
Time creates options. A deadline creates pressure. Begin early.
Frequently Asked Questions About How to Get a Dog Comfortable in an Airline Carrier
Start farther away from confinement.
Leave the carrier open and reward calm investigation. Gradually work toward voluntary entry before closing it.
If your dog shows severe panic or tries to injure itself escaping, seek professional behavioural or veterinary guidance rather than simply increasing confinement.
There is no fixed timetable.
Some dogs may adapt quickly, while others need days or weeks, particularly if they have previous negative experiences with confinement.
RSPCA, AKC and Fear Free guidance all emphasize gradual progression rather than training according to a rigid deadline. RSPCA
Yes, during the training period this can help make it part of the normal environment.
Leave it open and safe, and periodically place treats or familiar items inside.
For many dogs, yes.
Meal feeding can help build a positive association as long as your dog is comfortable enough to eat.
Do not force a worried dog inside merely to reach its meal.
That can still be progress.
Reward voluntary entry and slowly increase the amount of time your dog remains inside.
Do not immediately block the exit.
After your dog is comfortable entering and spending at least a short period inside voluntarily.
Initially close it only briefly.
Yes.
A stationary carrier and a moving carrier feel very different.
Begin with tiny lifts, then a few steps, and gradually build toward realistic movement.
If your dog will travel by car to the airport, short gradual vehicle practice can reduce another source of novelty.
Blue Cross recommends building car exposure from brief, low-pressure sessions toward longer trips. Blue Cross
Yes.
Food can be useful for creating positive associations and rewarding entry, resting and calm behaviour.
Use treats as part of gradual training rather than using food to lure your dog into a situation that immediately becomes frightening.
If your dog normally loves the food but refuses it near or inside the carrier, the training environment may be too difficult.
Increase distance or return to an easier step.
Also consider whether nausea, illness or another issue could be involved.
That depends on the carrier, dog’s preference and airflow.
Do not block required ventilation.
For airline travel specifically, ventilation takes priority over creating a dark den.
A thin familiar item may help some dogs, but thick materials can reduce usable space and ventilation.
For short-nosed dogs especially, AVMA advises avoiding bulky bedding that could interfere with breathing. AVMA
Do not self-medicate your dog for air travel.
Speak with your veterinarian about the underlying problem and whether any medication is medically appropriate.
AVMA warns against routine tranquilisation during air travel. AVMA
Yes.
Young dogs can learn carrier familiarity through the same gradual positive approach.
Keep sessions age-appropriate and avoid excessive confinement.
Stop and investigate why.
Possible causes include stress, inadequate conditioning, boredom, confinement anxiety or an unsuitable carrier.
A dog that can damage the mesh also presents an escape risk, so do not ignore the behaviour.
Look for reliable voluntary entry, tolerance of closure, ability to settle, tolerance of carrier movement and normal recovery after practice.
A dog that repeatedly panics during realistic sessions may not be ready simply because the travel date has arrived.
Somewhat.
The dog may need to temporarily leave the carrier during screening, so practise controlled exits, leash handling and calm re-entry.
The related first-time dog flying guide explains airport and security procedures in more detail.
No.
Air travel contains experiences you cannot fully reproduce at home.
Carrier training reduces novelty and can improve preparation, but it cannot guarantee that an individual dog will experience no stress.
When Professional Help Is the Better Choice
Seek additional help if your dog:
- panics whenever enclosed
- repeatedly injures itself trying to escape
- destroys carrier mesh aggressively
- cannot tolerate even early training stages
- has severe separation anxiety
- displays significant aggression around confinement
- has respiratory or medical concerns
- becomes repeatedly motion sick
Fear Free recommends addressing the underlying cause when dogs show significant fear, anxiety or stress around crates rather than simply obtaining increasingly strong containment equipment. Fear Free Happy Homes
A veterinarian can help rule out medical contributors and refer you to an appropriate behaviour professional where necessary.
Where Carrier Training Fits Into the Full Dog Air-Travel Plan
Think of your three HA Pet Supplies articles as a journey.
STEP 1 — CHOOSE
Start with:
How to Choose a Dog Airline Carrier: Size, Airline Requirements & Features to Check Before Flying
This determines whether you have suitable equipment.
STEP 2 — PREPARE
You are here:
How to Get a Dog Comfortable in an Airline Carrier Before a Flight
This builds familiarity with the equipment.
STEP 3 — TRAVEL
Then read:
Flying With a Dog for the First Time: Complete Airport & Airplane Travel Guide
That article handles check-in, security, boarding and flight-day logistics.
This internal structure allows a confused customer to move naturally from:
Which carrier? → Will my dog tolerate it? → What happens at the airport?
rather than being confronted with unrelated links.
Final Takeaway: How to Get a Dog Comfortable in an Airline Carrier
Learning how to get a dog comfortable in an airline carrier is not about putting your dog inside and waiting until the struggle stops.
It is about making the carrier familiar in stages.
Start with an open carrier.
Reward curiosity.
Teach voluntary entry.
Build comfortable time inside.
Introduce the zipper separately.
Increase closed duration gradually.
Then add movement.
Then short travel practice.
Then realistic preparation.
This approach cannot guarantee that your dog will love flying.
But it can remove one major unknown from an already unfamiliar journey.
IATA, USDA, veterinary behaviour sources and major dog welfare organisations all point toward the same broad principle: prepare the dog for confinement and travel before the journey rather than expecting the animal to adapt instantly at the airport. IATA
If you still need suitable travel equipment, review the HA Pet Supplies dog airline carrier and compare its size with both your dog and your airline’s requirements.
For additional dog-care products, browse the HA Pet Supplies dog supplies collection or the complete HA Pet Supplies shop.
If you need product-specific help, contact HA Pet Supplies. Retailers and larger-volume buyers can also request a quote where appropriate.
You can find additional pet-care education through the HA Pet Supplies blog or return to HA Pet Supplies for the broader product range.
The most important idea to remember is:
Do not make the first flight the first real carrier-training session.
Make the carrier familiar at home so that when travel day arrives, your dog is dealing with fewer surprises.
Ready to Prepare Your Dog for Calm Air Travel?
Get a personalised quote for HA Pet Supplies’ travel-friendly dog airline carriers and accessories. Our team can help you find the right carrier for your dog and your airline’s requirements.
Request a Quote →