
You bought a dog ramp to make life easier. But when you place it beside the car, your dog stops, stares at it, and refuses to take even one step. What should you do?
Perhaps you try placing a treat near the top. Your dog stretches forward but keeps all four paws firmly on the ground. Maybe the dog places one paw on the ramp, quickly pulls it away, and walks around the equipment instead. You are trying to help, but the situation is becoming frustrating.
This is a common problem when introducing mobility equipment. Dogs are not automatically familiar with ramps, even if they confidently walk across ordinary floors, sidewalks, and furniture. A ramp introduces an unfamiliar surface, different traction, a narrow walking path, and eventually a change in height. For a nervous dog, that combination can feel intimidating.
Learning how to train a dog to use a ramp can help turn that unfamiliar equipment into something predictable and comfortable. The key is gradual introduction, positive reinforcement, suitable equipment, and careful attention to your dog’s physical abilities.
Some dogs begin confidently walking across a low ramp after a few short sessions. Others need more time, particularly if they are older, have limited mobility, or have experienced a previous slip. Your goal should never be to force your dog to climb. Instead, you want your dog to understand that the ramp is a stable, comfortable walking surface that leads to a familiar destination.
In this comprehensive guide, you will learn seven practical training steps, how to teach ascending and descending separately, and what to do when your dog freezes halfway up. You will also discover how to adapt training for cars, SUVs, beds, and sofas, along with safe methods for introducing wooden pet stairs.
By the end, you should understand how to build a training routine that progresses at your dog’s pace without unnecessary fear, rushing, or slipping.

Gradual rewards help dogs become comfortable with pet mobility equipment
Image note: The photograph illustrates training on stepped wooden pet stairs, not a continuous ramp. The same reward-based principles apply, but ramp training and stair climbing require different movements.
📋 Table of Contents
- 1. Quick Answer: How to Train a Dog to Use a Ramp
- 2. Why Dogs Are Afraid of Ramps and Pet Stairs
- 3. What You Need Before Starting Ramp Training
- 4. How to Train a Dog to Use a Ramp in 7 Easy Steps
- 5. How to Teach Your Dog to Walk Down a Ramp
- 6. How to Train a Dog to Use a Car Ramp
- 7. How to Train a Dog to Use a Ramp for Beds and Sofas
- 8. How to Train a Dog to Use Wooden Pet Stairs
- 9. Special Training Considerations for Senior Dogs
- 10. Ramp Training for Dogs With Arthritis or Joint Problems
- 11. What to Do When Your Dog Refuses the Ramp
- 12. How to Prevent Slipping During Training
- 13. Common Ramp Training Mistakes
- 14. Practical Training Schedule and Progress Tracker
- 15. Choosing the Right Ramp or Pet Stairs
- 16. Maintaining Confidence After Training
- 17. Choosing HA Pet Supplies Mobility Products
- 18. Frequently Asked Questions
- 19. Final Training Checklist and Recommendations
1. Quick Answer: How to Train a Dog to Use a Ramp
If you need an immediate answer, begin with the simplest possible training environment. Do not start by positioning a steep ramp against a tall SUV or high bed. Instead, choose a stable, level surface where your dog can investigate the equipment without needing to climb.
The seven-step method is simple:
- Allow your dog to investigate the ramp.
- Reward calm behavior near the equipment.
- Encourage voluntary paw contact.
- Practice walking across a flat or very low ramp.
- Introduce a gentle incline gradually.
- Train ascending and descending separately.
- Practice at the final destination using secure equipment.
The most important principle is to reward comfortable progress rather than forcing completion. According to the American Kennel Club’s guide to dog ramps and stairs, dogs should be allowed to explore the equipment, with rewards used to encourage gradual movement. If your dog becomes uncomfortable, return to an easier stage.
Quick Problem and Solution Table
| Problem | Likely Considerations | First Action |
|---|---|---|
| Dog refuses to approach | Fear or unfamiliarity | Reward looking at and investigating the equipment |
| Dog puts one paw on and retreats | Uncertainty about surface | Reward brief voluntary paw contact |
| Dog walks sideways | Narrow surface, poor traction, unfamiliar movement | Check width, grip, and comfort |
| Dog slips halfway | Surface or incline may be unsuitable | Stop and inspect the setup |
| Dog climbs but refuses to descend | Different balance demands or fear | Teach descent separately at low height |
| Dog tries jumping off the side | Equipment may feel unsafe | End the attempt and make the exercise easier |
| Dog suddenly refuses after previous success | Pain, fear, instability, or changed conditions | Inspect the setup and consider veterinary evaluation |
What If You Need to Leave Right Now?
If your dog refuses to use a car ramp and you need to travel, do not force a rushed training session. Use a suitable alternative that is safe for the dog and handler. If safe loading is not possible, seek assistance or arrange an alternative. A rushed attempt near traffic or a slippery vehicle opening can create unnecessary risk.
2. Why Dogs Are Afraid of Ramps and Pet Stairs
Before teaching the behavior, understand why your dog may be hesitant. A ramp that looks stable to a person can feel unfamiliar to a dog.
The Walking Surface Feels Different
Dogs receive sensory information through their paws. A textured carpet ramp, rubber surface, or raised wooden step feels different from the floor. Your dog may investigate carefully before trusting it.
The Equipment May Move
A ramp that wobbles, flexes unexpectedly, or slides can frighten a dog. Even small movements may reduce confidence. Check the equipment’s stability before introducing it.
The Incline May Be Intimidating
Walking upward on a slope requires different body positioning from walking across level ground. A gradual incline is generally easier to introduce than a steep setup.
Narrow Ramps Can Feel Uncomfortable
Some dogs are nervous when walking across surfaces with visible edges. The AKC guide to accessible homes for senior dogs recommends stable ramps with suitable traction and dimensions.
Previous Slipping Can Create Fear
If your dog previously slipped or lost balance, it may associate the equipment with that experience. Confidence may need to be rebuilt through easier exercises. Do not repeatedly expose the dog to the same frightening setup.
Your Dog May Be Experiencing Pain
A dog that suddenly avoids jumping or climbing may have joint discomfort or another medical problem. The PetMD veterinarian-written guide to dog ramps and stairs explains that ramps and steps can help dogs with mobility limitations, but the correct choice depends on individual health and physical ability. If hesitation is new or accompanied by stiffness or limping, arrange veterinary assessment.
Why Fear Should Not Be Punished
Punishing a dog for avoiding a ramp can make the situation worse. The dog may begin associating the equipment with pressure or distress. A better approach is to make the task easier and reward voluntary participation.
3. What You Need Before Starting Ramp Training
Good preparation can prevent many training problems.
| Item | Purpose |
|---|---|
| Suitable dog ramp or pet stairs | Provides the correct training equipment |
| Small dog treats | Rewards voluntary progress |
| Non-slip floor mat | Provides secure footing around the equipment |
| Harness and leash | Helps maintain supervision and control without pulling |
| Familiar toy | Optional reward for toy-motivated dogs |
| Quiet training area | Reduces distractions |
| Stable destination | Allows safe practice once basic training is complete |
Choose the Correct Ramp
A training ramp must support your dog’s weight and provide enough usable walking width. It should not rock or slide. If the product can be safely positioned flat according to the manufacturer’s instructions, that is often a useful starting point. Never place a ramp on unstable boxes or improvised supports.
Choose High-Value Rewards
Use small treats your dog enjoys and can eat safely. The rewards should be suitable for your dog’s dietary needs. Some dogs prefer praise or toys, but food rewards are often convenient because they can be delivered immediately.
Choose a Quiet Location
Begin in a familiar indoor area. Avoid busy rooms, loud noises, other pets running around, or slippery flooring. Reduce distractions so your dog can concentrate on the new surface.
Inspect the Walking Area
Check the approach and landing areas. Make sure the dog can enter and leave the equipment without sharp turns, clutter, or obstacles. The VCA Animal Hospitals guide to creating an accessible home recommends non-slip flooring, stable mobility equipment, and avoiding unnecessary obstacles.
Decide When to End a Session
Before beginning, establish a simple rule: stop while the dog is still comfortable. A successful session may involve only one small improvement. Training progress should be measured by confidence rather than the number of repetitions.
4. How to Train a Dog to Use a Ramp in 7 Easy Steps
These seven steps form the core of the training plan. They should not be treated as seven activities that must all happen during one session. Some dogs may learn quickly, while others require repeated practice over several days or longer. Progress at the dog’s individual pace.
🗺️ Seven-Step Training Roadmap
Click any step to reveal the objective, reward method, and common mistake
Explore
Reward: Praise calm looking, sniffing, and approaching.
Success: Dog can approach without persistent fear.
Mistake: Luring the dog to the top immediately.
Approach
Reward: Treats for standing calmly beside the ramp.
Success: Dog approaches willingly and stays relaxed.
If dog backs away: Increase distance and reward from there.
Paw Contact
Reward: Immediate treat after voluntary paw placement.
Success: Dog places paws without being physically positioned.
Mistake: Grabbing the dog’s legs to place them.
Flat Walking
Reward: Treat each comfortable movement.
Success: Natural movement with no distress.
If dog jumps off: Stop and reassess width, grip, and confidence.
Gentle Incline
Reward: Reward small amounts of uphill movement.
Success: Dog ascends without rushing or slipping.
Important: Dogs with arthritis may need veterinary guidance on slope.
Up & Down
Reward: Reward slow, voluntary forward movement.
Success: Dog moves both directions comfortably.
Mistake: Pulling the dog down by leash or collar.
Final Destination
Reward: Reward calm approaches and voluntary use.
Success: Dog uses installed equipment comfortably.
Remember: New environments introduce new distractions.
This is a progression of skills — not a seven-minute solution.
Step 1: Introduce the Ramp Without Asking Your Dog to Climb
Place the equipment in a safe, stable position. Allow your dog to approach naturally. Do not call the dog onto the ramp immediately. Instead, reward calm investigation. If your dog looks at the ramp, calmly praise it and offer a treat. If the dog sniffs the surface, reward that behavior. If the dog walks around the ramp without fear, that can also be a useful start.
Step 2: Reward Calm Behavior Near the Equipment
Once your dog is comfortable approaching, begin rewarding closer interaction. Place yourself near the ramp’s lower end. Reward the dog for standing calmly beside it. Gradually encourage the dog to move toward the walking surface. Avoid blocking the dog’s exit. A nervous dog should be able to step away rather than feeling trapped. The AKC targeting-training guide explains how dogs can learn to interact with objects through small, rewarded steps.
Step 3: Encourage One Paw, Then Two Paws
Now begin teaching your dog that touching the ramp can lead to a reward. Place a small treat where the dog can investigate without stretching awkwardly. If the dog voluntarily places one paw on the surface, mark the behavior with praise or a familiar reward marker. Offer a treat immediately. Repeat until the dog appears comfortable. Then reward voluntary placement of two paws. Do not grab the dog’s legs and place them on the ramp. Forced paw placement can make a cautious dog more uncomfortable.
Step 4: Practice Walking Across a Flat or Very Low Ramp
Once your dog is comfortable placing paws on the equipment, encourage a few steps. Use a flat configuration if the ramp is specifically designed for safe flat use. Otherwise, select the lowest approved incline. Position yourself so your dog can walk forward without twisting its body. Reward each comfortable movement. At first, the dog may take only one or two steps. That is enough.
Step 5: Introduce a Gentle Incline Gradually
After your dog can walk comfortably across the low setup, you may introduce a slight incline. Use the manufacturer’s approved positioning and support system. Never improvise an unstable height adjustment. Allow the dog to approach the ramp voluntarily. Reward small amounts of uphill movement. If the dog stops halfway, avoid pulling or pushing. Give the dog an opportunity to recover calmly. If the dog remains uncomfortable, return to an easier configuration.
Step 6: Teach Ascending and Descending Separately
Climbing upward and moving downward are different tasks. Some dogs readily climb a ramp but refuse to descend. Others are more comfortable approaching from the top. Practice each direction separately using a suitably low setup. For descending, begin with the smallest safe height difference. Use rewards to encourage slow, voluntary forward movement. Do not pull the dog down by a leash or collar. The PetMD stair safety guide emphasizes controlled movement and appropriate support.
Step 7: Practice at the Final Destination
Once your dog understands the ramp and can manage an appropriate incline, introduce the real location. This may be a car, SUV, bed, or sofa. Set up the equipment according to the manufacturer’s instructions. Check the height, attachment, traction, and landing area. Begin by rewarding calm approaches. Then invite the dog to move onto the ramp. Use the same cues and reward system from earlier training. Do not assume that success in the living room guarantees immediate success beside a vehicle. New environments can introduce additional distractions.
Important Reminder About the Seven Steps
This is a progression of skills, not a seven-minute solution or guaranteed seven-day timetable. Some dogs need more repetition at particular stages. Others may never become comfortable with a specific ramp design. Your responsibility is to observe whether the equipment and training process genuinely suit your dog.
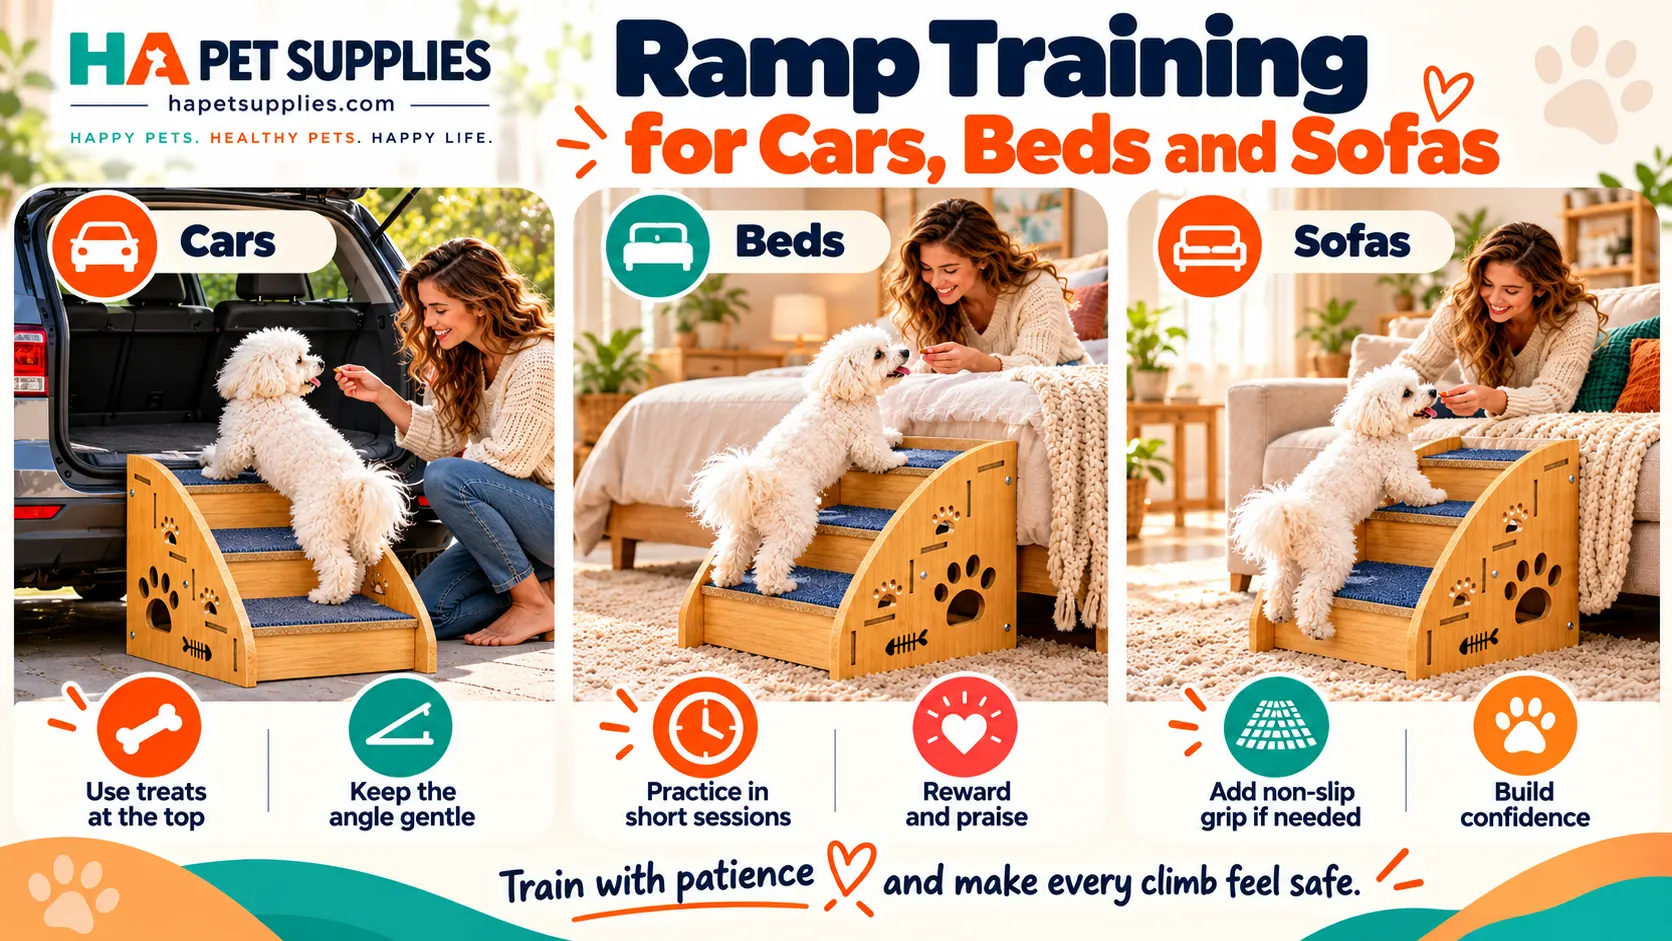
Practice on stable low surfaces before introducing higher access points
5. How to Teach Your Dog to Walk Down a Ramp
Many owners successfully train their dogs to climb upward but overlook the descent. This can become a problem when the dog reaches the bed or enters a car and does not know how to return safely.
Why Descending Is Different
Moving downhill changes the way the dog balances and controls its body. A dog may feel less secure when looking down toward the floor. Older dogs or dogs with painful joints may find descent particularly challenging.
Start With a Very Low Setup
Begin at a low, stable height that your dog can manage comfortably. Do not start with a tall vehicle or high bed. Reward calm positioning at the top. Then encourage one voluntary step forward.
Keep Rewards Close
Avoid placing treats far away where the dog may attempt to leap toward them. Reward small, controlled movement.
Prevent Sideways Exits
Make sure the ramp is wide enough. Where appropriate, follow manufacturer guidance on side protection or positioning. Do not physically block a frightened dog into a narrow area. Instead, return to a safer and easier setup.
When to Stop Descending Practice
Stop if the dog rushes, trembles, slips, repeatedly attempts to jump off, or shows signs of pain. The problem may be fear, equipment design, or physical difficulty. Do not assume more repetition will solve every issue.
6. How to Train a Dog to Use a Car Ramp
Vehicle training requires extra preparation. Unlike indoor ramp training, the environment may contain traffic, noise, unfamiliar smells, and changing ground conditions.
Step 1: Choose a Safe Parking Location
Park on stable, reasonably level ground away from moving traffic. Make sure there is enough space to deploy the ramp. Keep your dog secured while you prepare the equipment.
Step 2: Install the Ramp Correctly
Follow the manufacturer’s instructions for attachment and placement. Verify that the ramp does not slide, shift, or wobble. Check that the vehicle contact point is suitable for supporting the ramp.
Step 3: Allow Your Dog to Investigate
Do not immediately demand entry into the car. Reward approaching and investigating the equipment. Let the dog become familiar with the new setting.
Step 4: Practice Low-Difficulty Entry
Use a manageable configuration permitted by the ramp design and appropriate for the vehicle. If the incline is too steep, the ramp may be unsuitable for that vehicle. Do not try to compensate by forcing your dog upward.
Step 5: Encourage Voluntary Climbing
Use treats and a familiar cue. Reward gradual progress rather than rushing to reach the top. Avoid pulling the dog by the neck or collar.
Step 6: Reward Calm Arrival
When the dog reaches the vehicle, reward calm behavior. Teach the dog to pause rather than immediately jumping around the cargo area.
Step 7: Practice Exiting Separately
Train descent with the same patience. A dog that successfully climbs into a vehicle may still need several sessions to become comfortable leaving it.
Vehicle Safety Beyond the Ramp
The ramp is an access tool, not a travel restraint. Once inside the vehicle, secure your dog appropriately for travel. Never allow a dog to run unsupervised out of the car near traffic.
What if Your Dog Is Afraid of the SUV?
SUVs may have higher loading surfaces. Even confident dogs can hesitate when approaching a steep or narrow ramp. Measure the actual vehicle height and compare it with the ramp’s usable length. If you need help choosing the correct dimensions, see our related article: Best Dog Ramp for Cars, SUVs and Beds. The guide explains how to evaluate height, length, width, incline, and stability.
7. How to Train a Dog to Use a Ramp for Beds and Sofas
Indoor training may seem easier because the dog is already comfortable at home. However, familiar furniture can introduce another challenge: the desire to jump directly onto the destination.
Measure the Furniture Height
Before training, measure from the floor to the top of the mattress or sofa seat. Ensure that the ramp reaches the destination without leaving a significant gap. Check that its incline remains appropriate.
Position the Ramp Correctly
Place the ramp where the dog can approach naturally. Avoid narrow spaces or awkward turns. Make sure the equipment rests securely on the floor and contacts the furniture appropriately.
Train Away From the Furniture First
If possible, introduce the ramp at a lower difficulty before placing it beside the bed or sofa. This helps the dog learn the movement without being distracted by the destination.
Encourage Walking Instead of Jumping
Some dogs will attempt to bypass the ramp and jump directly onto the furniture. Do not physically restrain the dog in a way that creates panic. Instead, manage the environment and reward using the intended route.
Practice Getting Down
Descending from furniture is important. Train the dog to return to the floor using the mobility aid rather than jumping directly down. Keep the landing area clear and non-slip.
What About High Beds?
Very high beds may require long ramps to create a manageable incline. In small rooms, adequate ramp length may not be practical. Consider lower furniture or a different veterinarian-approved arrangement rather than forcing a steep setup.
What About Small Sofas?
A compact ramp may work when the seat height is low. However, some healthy, agile dogs may be comfortable using correctly sized pet stairs. For help deciding which product suits the dog, read Dog Ramp vs Stairs: Which Is Better for Senior Dogs, Small Dogs and Dogs With Joint Problems?.
8. How to Train a Dog to Use Wooden Pet Stairs
The HA Pet Supplies product shown in your Blog 3 images is a set of wooden pet stairs with blue carpeted treads. Because stairs and ramps require different movements, training needs a small adjustment.
Step 1: Introduce the Staircase
Place the staircase securely on a non-slip floor. Let your dog sniff and investigate. Reward calm interaction.
Step 2: Encourage the First Step
Place a reward where the dog can reach it after voluntarily approaching the first tread. Reward one paw, then both paws if the dog remains comfortable. Avoid physically lifting the paws onto the step.
Step 3: Practice a Small Step-Up Movement
Allow the dog to step onto the first tread. Reward the movement. Do not rush to the top.
Step 4: Practice Moving Down
Encourage the dog to step back onto the floor in a controlled manner. Some dogs need more practice descending.
Step 5: Add the Next Step
Only increase difficulty when the first movement feels comfortable. Reward each voluntary step.
Step 6: Practice the Complete Staircase
Allow the dog to climb the selected staircase using calm, controlled movement. Do not pull or push from behind.
Step 7: Introduce the Furniture Destination
Position the stairs securely beside the sofa or bed. Check the total height and landing position. Reward appropriate use.
Choosing Two, Three, or Four Steps
Step count alone does not determine suitability. The total height, individual riser height, tread depth, stability, and your dog’s physical abilities all matter. The American Kennel Club’s senior home accessibility guide recommends deep, anti-skid steps for senior dogs that remain sufficiently agile.
When Stairs Are Not Appropriate
Dogs with significant joint or back problems may struggle with repeated stepping. In such cases, a continuous ramp or another veterinarian-approved access method may be preferable.
9. Special Training Considerations for Senior Dogs
Training an older dog requires additional attention to physical comfort. A senior dog may be slower to respond because of stiffness, reduced confidence, sensory changes, or other health concerns.
Start With a Health Assessment
If your dog is suddenly avoiding familiar furniture or struggling to enter a vehicle, arrange veterinary evaluation. Changes in movement should not automatically be attributed to old age.
Keep Sessions Comfortable
Older dogs may benefit from short, positive sessions with rest between attempts. Avoid lengthy repetition. Observe for fatigue.
Choose Gentle Movement
A suitable low incline may be easier than individual steps for some dogs. However, the choice should reflect the dog’s diagnosis and abilities.
Improve Surrounding Floor Traction
Slippery floors can make approaching a ramp difficult. Secure rugs or non-slip mats may help. The VCA guide to helping dogs with osteoarthritis recommends accessible environments, non-skid surfaces, and appropriately selected mobility equipment.
Reward Confidence, Not Speed
Do not encourage an older dog to rush. Reward steady, comfortable movement. If your dog needs longer to complete the ramp, allow that time.
Watch for Fatigue
A dog that begins walking normally but gradually becomes hesitant may be tired or uncomfortable. End the session rather than demanding one more repetition.
10. Ramp Training for Dogs With Arthritis or Joint Problems
Dogs with joint problems need individualized handling. A ramp may reduce the need for a direct jump, but it still requires physical effort.
How Arthritis Affects Movement
Osteoarthritis can cause pain, stiffness, and reduced mobility. Dogs may hesitate when climbing, standing, or entering vehicles. The VCA Animal Hospitals arthritis guide describes ramps, non-skid flooring, and other home modifications as possible supportive measures.
Why a Gentle Incline Matters
A steep incline increases the effort required to climb. For dogs with painful joints, even a ramp may become uncomfortable if the slope is too challenging. Work with your veterinarian to determine whether the setup is appropriate.
Avoid Training During Painful Episodes
If your dog is limping, struggling to stand, or showing clear discomfort, do not continue. Mobility equipment should not be used to push through pain.
Do Not Assume Post-Surgery Use Is Allowed
Some surgical recovery plans prohibit climbing ramps or stairs for a period. Always follow the surgeon’s or veterinarian’s instructions.
Consider Rehabilitation Guidance
Dogs with significant orthopedic or neurological limitations may benefit from veterinary rehabilitation. The VCA multimodal pain management guide explains the importance of combining medical care with suitable environmental and mobility support.
Why the Dog’s Comfort Is the Final Test
A ramp is not automatically successful because the dog reaches the top. Success means the dog can complete the movement without obvious pain, slipping, fear, or unsafe compensatory behavior. If those problems continue, reassess the equipment and training plan.
11. What to Do When Your Dog Refuses the Ramp
A dog refusing a ramp is not necessarily being stubborn. Begin by identifying what happens immediately before the refusal.
Problem 1: The Dog Will Not Approach
The equipment may be unfamiliar or frightening. Move back to rewarding relaxed behavior at a distance. Allow the dog to approach voluntarily.
Problem 2: The Dog Sniffs but Will Not Step On
The walking surface may feel unusual. Reward brief voluntary paw contact. Avoid luring so far forward that the dog has to stretch awkwardly.
Problem 3: The Dog Freezes Halfway
Stop applying pressure. Do not pull forward or push from behind. Allow the dog to regain confidence, and return to a lower-difficulty setup for the next session. If the dog cannot safely move forward or backward, obtain appropriate assistance rather than forcing movement.
Problem 4: The Dog Tries to Jump Off
This is a safety concern. Stop the exercise and inspect the setup. The ramp may be too narrow, steep, unstable, or frightening.
Problem 5: The Dog Climbs Only for Treats
During early training, rewards are useful. Once the dog understands the task, begin rewarding appropriate use more selectively while maintaining positive associations. Avoid removing rewards so quickly that confidence disappears.
Problem 6: The Dog Uses the Ramp Indoors but Not at the Car
The vehicle creates a new environment. Return to easier steps at the vehicle. Reward investigation and calm approach before asking for a complete climb.
Problem 7: The Dog Suddenly Stops Using a Familiar Ramp
Inspect the ramp for damage or movement. Check whether the surface has become slippery. Consider whether the dog may be experiencing pain. A sudden behavior change deserves attention, particularly in older dogs.
12. How to Prevent Slipping During Training
Slipping is one of the most important risks to address before introducing height.
Check the Surface Material
Carpet, textured rubber, and other grip materials may provide traction when properly designed and maintained. However, worn or wet surfaces can perform differently.
Inspect the Ramp Structure
Check hinges, supports, feet, and attachment points. Do not train on unstable equipment.
Check the Surrounding Floor
A secure ramp may still be difficult to approach if the surrounding floor is slippery. Use suitable non-slip mats where needed.
Watch Paw and Nail Condition
Overgrown nails or excessive fur between paw pads may affect traction. The VCA home mobility guidance discusses nail care, paw fur management, and secure flooring as important parts of home accessibility.
Avoid Wet Outdoor Training Surfaces
Rain, mud, and wet grass can change traction. For early outdoor sessions, choose suitable mild conditions and stable ground.
Keep the Ramp at a Manageable Incline
Even good traction may be insufficient if the angle is too steep for the dog. Do not attempt to solve an unsuitable incline by encouraging faster climbing.
Supervise Every Session
Do not leave an unfamiliar dog alone with elevated mobility equipment. Remain close enough to manage the environment without pushing or pulling.
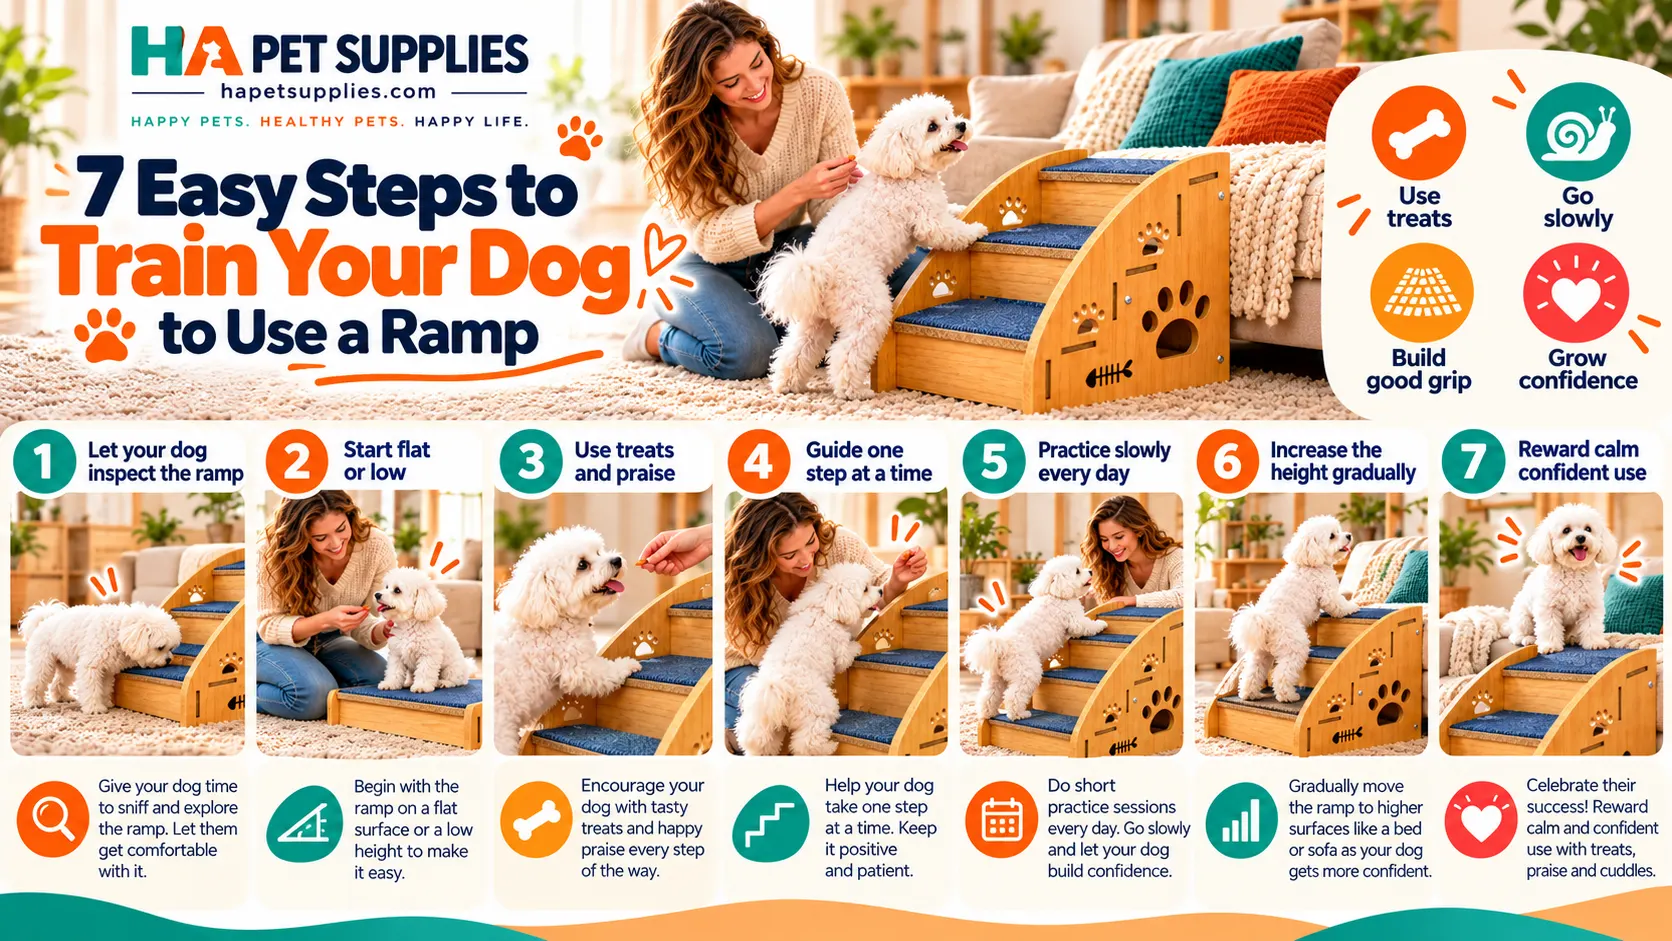
Reward small movements and increase climbing difficulty gradually
13. Common Ramp Training Mistakes
Avoiding common mistakes can make training safer and less frustrating.
- Mistake 1: Beginning With a Steep Ramp. A high incline introduces unnecessary difficulty. Start low when the equipment design allows it.
- Mistake 2: Pulling the Dog by the Collar. This can create pressure, fear, or unsafe movement. Use voluntary behavior and rewards.
- Mistake 3: Pushing From Behind. Pushing can make the dog feel trapped. It may also cause rushing or loss of balance.
- Mistake 4: Ignoring the Equipment’s Stability. Training cannot compensate for an unstable ramp. Fix the setup before continuing.
- Mistake 5: Using a Narrow Ramp for a Large Dog. Insufficient walking width can reduce confidence and increase missteps.
- Mistake 6: Expecting Immediate Success. Some dogs need multiple sessions to become comfortable. Avoid arbitrary deadlines.
- Mistake 7: Teaching Climbing but Not Descending. Both directions require practice.
- Mistake 8: Using Rewards to Encourage Rushing. A treat placed too far away may cause the dog to leap or lunge.
- Mistake 9: Ignoring Pain Signals. Limping, trembling, sudden refusal, or obvious discomfort should prompt stopping and reassessment.
- Mistake 10: Choosing the Wrong Product. A continuous ramp and wooden pet stairs are not identical.
14. Practical Training Schedule and Progress Tracker
A structured routine can help you avoid rushing the process. However, progress is individual. The following schedule is an example, not a guarantee that every dog will learn within seven days.
| Session | Main Objective | Success Indicator |
|---|---|---|
| 1 | Explore equipment | Calm investigation |
| 2 | Approach voluntarily | Comfortable proximity |
| 3 | Touch surface | One or more voluntary paw contacts |
| 4 | Walk on low setup | Calm forward movement |
| 5 | Introduce gentle incline | Comfortable short ascent |
| 6 | Practice both directions | Controlled ascending and descending |
| 7 | Practice final destination | Safe voluntary use of installed equipment |
How Long Should Each Training Session Last?
Begin with brief sessions. For some dogs, a few minutes may be sufficient. Others may be comfortable with slightly longer sessions. Stop before frustration or fatigue develops.
When Should You Repeat a Step?
Repeat a stage if your dog becomes hesitant, loses confidence, or shows signs of uncertainty. Repetition should strengthen confidence, not increase pressure.
What Counts as Progress?
Progress may look like approaching more willingly, placing paws on the surface without hesitation, walking more steadily, or calmly descending. Do not measure success only by reaching the top.
✅ Interactive Training Progress Tracker
Click each milestone to mark it complete and reveal your next recommended activity
15. Choosing the Right Ramp or Pet Stairs
Training works best when the equipment suits the dog. A product that is too steep, narrow, slippery, or unstable may remain difficult even after repeated practice.
Check the Intended Use
Vehicle ramps and indoor furniture stairs serve different purposes. A furniture staircase may not be suitable for car loading.
Measure the Destination Height
Measure from the floor or ground to the actual access surface. For a bed, measure to the mattress top. For a vehicle, measure the loading height.
Review Ramp Length and Incline
A longer ramp may provide a gentler slope for the same height. However, it must fit the available space and be securely supported.
Check the Weight Rating
Use equipment with an appropriate verified manufacturer load rating. Do not estimate strength from appearance alone.
Examine Non-Slip Features
A textured walking surface may improve traction. Check its condition regularly.
Consider Ramp vs Stairs
A continuous ramp may suit dogs that struggle with individual step climbing. Wooden pet stairs may work for healthy, agile small dogs that need furniture access. For a complete buying comparison, read our Dog Ramp vs Stairs guide for senior dogs, small dogs, and dogs with arthritis. The AKC dog mobility aid buying guide also explains why size, height, grip, stability, and purpose matter.
16. Maintaining Confidence After Training
Once your dog learns to use a ramp, continue reinforcing safe behavior.
Keep the Setup Consistent
If possible, use the same ramp position and approach direction. Frequent changes may create uncertainty.
Reward Good Habits
Offer praise or appropriate rewards for calm, controlled movement. Avoid encouraging unnecessary speed.
Inspect Equipment Regularly
Check traction materials, fasteners, hinges, support points, and overall stability. Do not continue using damaged equipment.
Reassess as Your Dog Ages
A ramp suitable for a healthy adult dog may become too steep for the same dog later in life. Monitor changes in movement and confidence.
Maintain Safe Flooring
Keep approach and landing areas non-slip. Remove clutter and unstable rugs.
Consider Weather During Car Training
Rain, cold, and heat can affect both the dog’s comfort and the equipment’s traction. Plan outdoor practice for appropriate conditions. If warm-weather comfort is also a concern, you can review the HA Pet Supplies dog cooling vest separately as a product designed for cooling support. A cooling vest does not replace shade, water, appropriate temperatures, or safe training surfaces.
Continue Veterinary Care Where Needed
If your dog uses a ramp because of arthritis or another diagnosed condition, continue the prescribed care plan. Mobility equipment may support everyday access, but it does not treat the underlying disease.
17. Choosing HA Pet Supplies Mobility Products
If you are looking for practical furniture-access equipment, HA Pet Supplies offers a relevant product page for evaluating dog ramps and pet stairs. The blue-carpeted wooden product shown in your Blog 3 images is a stepped pet staircase. It is important to distinguish this design from a continuous ramp.
What to Check on the Product Page
Visit the HA Pet Supplies dog ramp and pet stairs page to review the available product information. Check the actual construction, dimensions, total height, individual step rise, tread depth, and load rating. If two-step, three-step, or four-step configurations are available, compare them using verified product specifications.
Why Proper Sizing Comes Before Training
Training cannot correct a staircase with steps that are too high for the dog. Likewise, a narrow ramp may remain intimidating regardless of how many treats you offer. Choose equipment that allows comfortable movement.
Why Consider HA Pet Supplies?
At HA Pet Supplies, we aim to help buyers evaluate accessories according to everyday pet-care needs. Our dog supplies category provides access to related products for dogs. You can also explore available accessories through the HA Pet Supplies online shop.
Need Help Before Ordering?
If you are unsure whether the illustrated stairs suit your furniture, check the listed measurements carefully. For questions about specifications, sizing, or intended use, contact HA Pet Supplies through our contact page. Include your dog’s weight, furniture height, and any relevant product questions. For purchasing or pricing inquiries, you can also request a quote from HA Pet Supplies.
Continue Learning Before Buying
A good purchase begins with understanding the difference between physical suitability and training. The right product should help your dog move comfortably. The right training method should help your dog develop confidence. Both are necessary.
18. Frequently Asked Questions About How to Train a Dog to Use a Ramp
19. Final Training Checklist and Recommendations
Learning how to train a dog to use a ramp requires patience, suitable equipment, and careful observation. Before beginning your next session, use this checklist.
Final Seven-Point Training Checklist
- Inspect the equipment. Make sure the ramp or staircase is stable, undamaged, and appropriate for the dog’s weight.
- Check the environment. Choose safe, non-slip ground with enough room for approaching and leaving the equipment.
- Prepare positive rewards. Use small, appropriate treats, praise, or toys.
- Begin at an easy level. Allow your dog to investigate before asking for climbing.
- Reward voluntary movement. Encourage confidence without pushing or pulling.
- Train both directions. Ascending and descending may require different practice.
- Monitor comfort. Stop when the dog shows pain, fear, instability, or fatigue.
Final Thoughts: Confidence Begins With Small Steps
Imagine your dog standing beside a car, looking at the ramp. A few days earlier, the dog refused to approach it. Now your dog calmly walks toward the equipment, places one paw onto the surface, and pauses. You offer praise. Your dog takes another step. That small moment represents meaningful progress.
The goal of dog ramp training is not to make your pet climb as quickly as possible. It is to create a safe, predictable experience that the dog can manage comfortably. Some dogs learn quickly. Others require more time. Senior dogs or dogs with medical conditions may need a slower, veterinarian-guided process.
The important thing is to respect the dog’s physical limits while providing encouragement. Begin with a stable setup. Reward voluntary exploration. Practice easy movements before adding height. Teach descending as carefully as ascending. And remember that the right equipment matters just as much as the training method.
If you are comparing products for furniture access, explore the HA Pet Supplies dog ramp and wooden pet stairs product page and review the specifications carefully. For additional practical guidance, browse the HA Pet Supplies pet-care blog or visit HA Pet Supplies.
Confidence is built one comfortable step at a time. Train patiently, choose suitable equipment, and help your dog enjoy familiar places with greater security.